Preprosの使い方&Sass入門編
こんにちわ!ガイナーレ鳥取がJ3に落ちて意気消沈の山尾です!
さて今日のテーマはSassです!
もうあちこちで使われていてご存知の方も多いと思います。
簡単に説明しますと、効率よくCSSを書く為のCSSの拡張言語!
調べてみて便利なのはわかるけどRubyのインストールとか黒い画面とかめんどくさそう・・
っていう人におすすめ!
Preprosを使って簡単に環境を構築しよう!!
Preprossとは
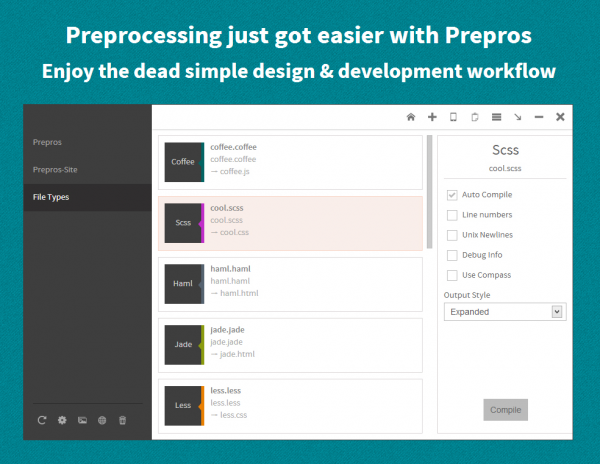
高機能無料コンパイラです。
まずは公式サイトからダウンロードしましょう
ダウンロード先 http://alphapixels.com/prepros/
左端のPrepros 3.1.0 for Windowsをクリックしてダウンロード&インストール
インストール方法は手順どおりなので割愛します。
Prepros実際に使う
なんでもいいのでcssを書きます。
以下のコードをコピペして使ってください。
@charset "utf-8";
 body{
     background: #fff; color:#333;
    }
それを任意のsassディレクトリに.scssファイルで保存
Preprosを立ち上げたらまずはプロジェクトを作成
sassディレクトリの入ったディレクトリをドラッグ&ドロップ!
これだけです。
sassディレクトリではなくその親ディレクトリを入れてください!
例common/sass/style.scssなら
commonを放り込んで下さい。
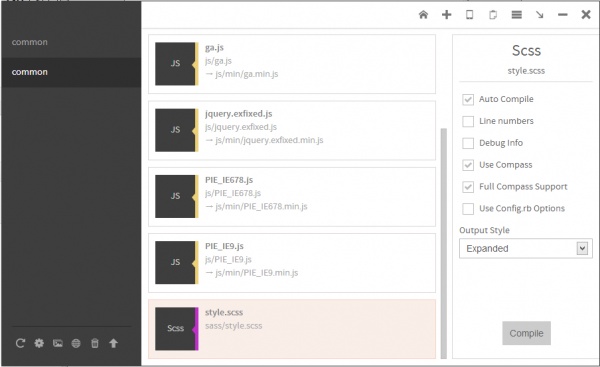
ファイルを選択し右のAuto Compile、Use、Compass、Full Compass Supportにチェックを入れてCompile!
緑の顔が出てきたらコンパイル成功
成功するとstylesheetsというディレクトリが作成されcssファイルが作成されます。
今のままだと自動で生成されディレクトリ名を変更できません。
このディレクトリ名を変更する方法。
config.rbファイルを親ディレクトリに置く
Compassの設定ファイルです。
# Require any additional compass plugins here.

# Set this to the root of your project when deployed:
http_path = "/"
css_dir = "common/css"
sass_dir = "common/sass"
images_dir = "img"
javascripts_dir = "common/js"

# You can select your preferred output style here (can be overridden via the command line):
# output_style = :expanded or :nested or :compact or :compressed

# To enable relative paths to assets via compass helper functions. Uncomment:
# relative_assets = true

# To disable debugging comments that display the original location of your selectors. Uncomment:
# line_comments = false


# If you prefer the indented syntax, you might want to regenerate this
# project again passing --syntax sass, or you can uncomment this:
# preferred_syntax = :sass
# and then run:
# sass-convert -R --from scss --to sass sass scss && rm -rf sass && mv scss sass
これを親ディレクトリに設置すればコンパイル後のファイルがcssディレクトリに保存されます。
保存場所を変えたい場合は
css_dir = "css"
の箇所を変更してください。
以上でPrerosのSass環境構築は完了です!
せっかくなので少しsassを書いてみましょう。
sassで何が出来るのか
ネスト出来る
header{

     width:100%;

        h1{

          color:#ccc;
    }

}
こんな感じになります。
通常のCSSの表記ですね。
header {

    width: 100%;

}
 header h1 {
    color: #ccc;
 }
変数が使える
$width: 960px;
$color:#fff

 header{

     width:$width;
    h1{
      color:$color;
  }

 }
表示はこうなります。
header {
    width: 960px;
  }

    header h1 {

     color: white;

    }
変数は設定ファイルを作りまとめて書いておくと便利ですね。
演算もできる
これが
$width: 960px;
$color:#fff;

header{

    width:$width - 20;

    h1{
        color:$color;
    }
}
コンパイル後、こうなります。
header {

   width: 940px;
  }

header h1 {

    color: white;
}
他にもMixinやextendなど便利な機能がいっぱいなSassです。
その辺の続きはまた次回!
それでは皆さん楽しいSassライフを!!


